
Garden Magic: Seed Paper Activity for Little Kids
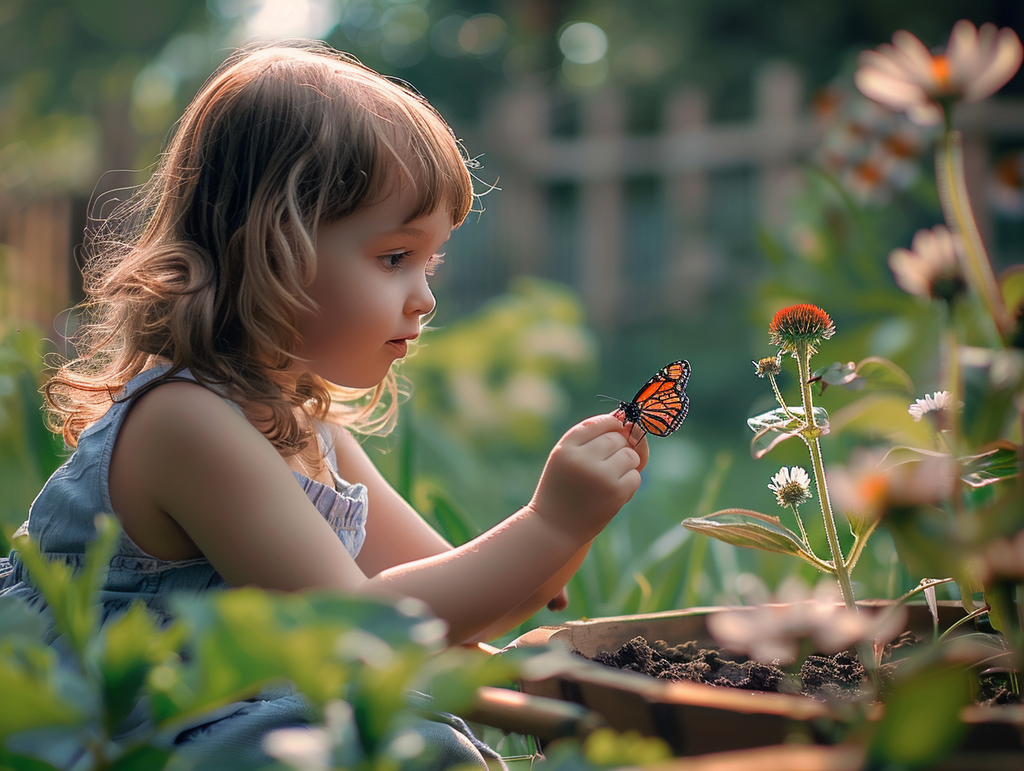
Ahhh, spring has finally arrived! After months of braving the chilly embrace of winter stuck for days on end inside, alongside your energetic little one, you've been eagerly awaiting the warmer days. And just like that, a single flower blooms, quickly followed by another, and another, until, lo and behold, spring has unfolded before our eyes (cue the joyful soundtrack). So, what's next? Naturally, it’s time for some fresh air and open space. With that in mind, here’s a super fun garden craft idea that's not only entertaining but also educational. It teaches patience as you await nature's magic to unfold, promotes eco-friendliness, and allows you to beautify your surroundings.

What is Seed Paper?
Seed paper is a homemade paper(made from recycled paper you have at home) mixed with seeds. When buried in soil, this special paper naturally decomposes, allowing the seeds to sprout into plants. It’s a great way for children to learn about gardening through a simple and hands on method, making it a perfect spring activity for little ones. Imagine taking a mini field trip to the garden each day to observe the growth of their flowers. Encourage them to note any differences they see: Are there butterflies or bees visiting? What colors can they spot? Do the blossoms emit any fragrances? Watch their senses soar!
Another sneaky awesome aspect of seed paper is all the extras; there are often several pieces left over from a single batch. These remnants can become thoughtful gifts. Consider taking a stroll around the neighborhood to share them with neighbors, bringing one to your child’s teachers or care providers,, or surprise grandparents with a special, earth-friendly present.
Why Seed Paper is a Fun and Educational Spring Activity For Little Kids
Creating seed paper with little kids is more than just a craft; it's an introduction to nature and botany. It's a hands-on activity to make the seed paper, and then waiting for your garden to grow is an exercise that encourages patience. Plus, it underscores the value of recycling and how everyday materials can be repurposed into something new and life-giving. Using recycled newspaper is great in the garden to contain weeds, hold in moisture, and regulate the ground temperature, and the best part is that the paper will slowly biodegrade. I always like to use plant-based dyes to ensure that your seed paper is safe for the environment. It’s a little more expensive, but dyes are something you can use again and again. And if your child is going to touch it or eat it, it feels better knowing it was derived from a plant, flower, or vegetable.
Items Needed For Seed Paper Craft:
- Recycled newspaper
- Blender or food processor
- Water
- Wildflower seeds or other easy-to-grow seeds suitable for your climate
- Sieve or mesh strainer
- Absorbent paper towels or cloths
- Natural food coloring (optional)
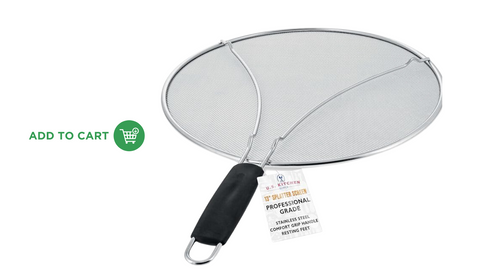
- Mesh splatter screen
- Cookie cutters or scissors for shaping (optional)
Here's a seed paper shopping list from Amazon with all the bits and bobs you might need for your garden craft adventure! Chances are, you've already got some of these essentials tucked away in your kitchen or scattered around the house (think paper towels, old newspapers, and that trusty mixer), so we didn't bother listing those. Feel free to mix and match, adding or removing items to make your garden crafting session absolutely perfect.
And hey, just a heads-up: If you click through and buy any of these products from Amazon, I'll earn a tiny commission. But don't worry, it won't cost you a penny extra. Your support means the world, and it's what keeps sites like ours thriving and bubbling with fun ideas. So, a huge thank you in advance for any purchases you make – you're the best!
Instructions For Making Seed Paper:
1. Prepare the Paper
Rip the recycled newspaper or regular un-dyed, non-glossly paper into small 1-2 inch pieces and place them in a large bowl. Cover the paper scraps with water and soak for several hours or overnight.
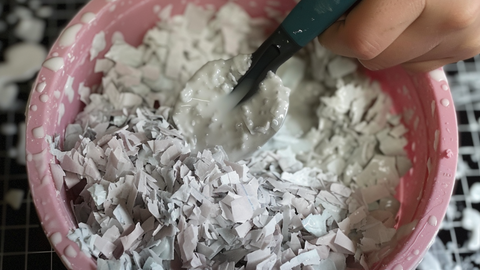
2. Blend to Create the Pulp
Drain the soaked paper and transfer it to a blender. Add small amounts of water as needed and pulse until a thick paste or soup-like consistency is achieved. For a touch of color, add several drops of plant based food coloring and mix well.

3. Add the Seeds:
Transfer the pulp to a mixing bowl. You can either stir the flower seeds directly into the paste or wait to sprinkle them on the paper paste in a later step for a more uniform seed distribution.
4. Shape and Dry the Paper:
Place a mesh splatter screen over several layers of absorbent towels. Spread the paper paste in a thin, even layer about 1/8 inch thick on the screen. Press the paste gently to squeeze out excess water. If adding seeds afterward, sprinkle them on top now and press lightly to embed.
Allow the seed paper to dry completely, which can take up to 24 hours. For faster drying, see the notes section below.
5. Cut into Shapes:
Once dry, use cookie cutters or scissors to cut the paper into fun shapes. Hearts, flowers, and animals are great choices for little kids.
For a easy DIY option, download our traceable seed paper shapes for free here.
6. Plant - Planting Instructions:

Plant the seed paper under a thin layer of soil in a pot or garden spot that receives plenty of sunlight. If it's still too cool outside, start in an indoor container. Keep the soil moist to help germination, which usually occurs within 4-14 days. Water the young plants as needed and watch them grow!
Notes for Fast Drying:
- To speed up the drying process, you can use a hairdryer on a cool setting or place the seed paper in a warm, well-ventilated area.
- The thickness of the paper will affect drying time; thinner layers dry faster.
Final Thoughts On Seed Paper Activity
The seed paper activity is an engaging way for kids to interact with nature, watching something grow from seed into something beautiful, and it also gives them a special something to share with friends and family. We hope you enjoy creating beautiful flower gardens and appreciating all the creatures it provides food and homes for. We'd love to see your pictures! If you post them, we may feature them on our Instagram, Facebook, Pinterest, or blogs. If you'd like to be mentioned, please be sure to leave your social media info. Happy planting and happy spring!